Converting ABSniffer 528 dongle into nRF BLE Sniffer with CMSIS-DAP dongle on Linux
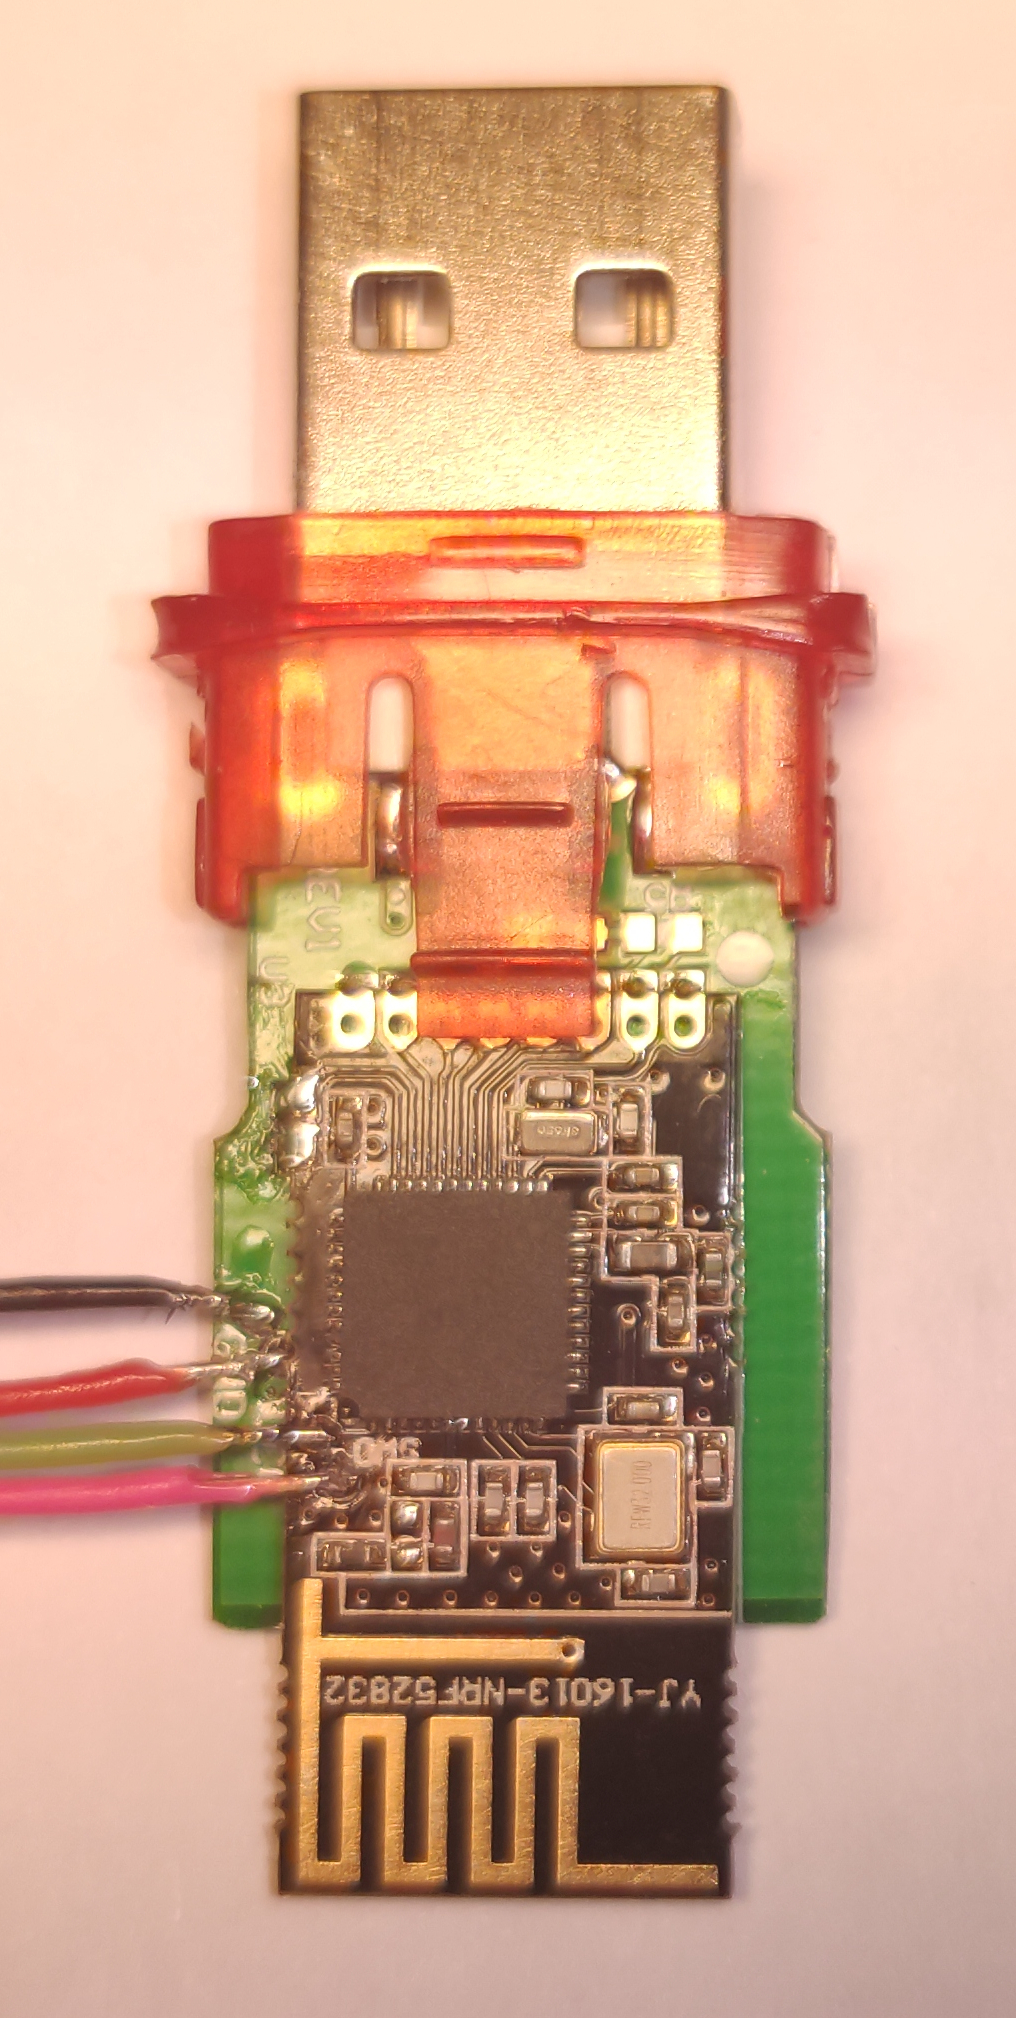
nRF52832 ABSniffer 528 USB Dongle
In order to utilize the dongle better for PineTime development purposes I decided to flash it with official Nordic BLE sniffer software available here: https://www.nordicsemi.com/Software-and-tools/Development-Tools/nRF-Sniffer-for-Bluetooth-LE
Set up CMSIS-DAP udev rules
In order to be able to access the CMSIS-DAP programming dongle without root, the correct way, you have to add a few udev rules to set the right permissions upon plug-in. This method also works with other similar programming dongles such as JLink, USBasp and similar, you just have to substitute the VID and PID values.
Open the file /etc/udev/rules.d/99-cmsis-dap.rules and add this content:
# 0d28:0204 DAPLink
SUBSYSTEM=="usb", ATTR{idVendor}=="0d28", ATTR{idProduct}=="0204", MODE:="0666"

# c251:2750 Keil ULINKplus
SUBSYSTEM=="usb", ATTR{idVendor}=="c251", ATTR{idProduct}=="2750", MODE:="0666"

# 1fc9:0090 NXP LPC-LinkII
SUBSYSTEM=="usb", ATTR{idVendor}=="1fc9", ATTR{idProduct}=="0090", MODE:="0666"

# c251:f001 Chinese CMSIS-DAP
SUBSYSTEM=="usb", ATTR{idVendor}=="c251", ATTR{idProduct}=="f001", MODE:="0666"
Connect CMSIS-DAP to the dongle
I used my trusty TS-80 to solder a few wires onto the dongle to get access to the programming port
Install OpenOCD
First clone the OpenOCD repository with git clone https://repo.or.cz/w/openocd.git. This is the software that controls the CMSIS-DAP in order to flash other firmware on the ABSniffer dongle.
When that is completed, run ./bootstrap, that sets up everything required to configure the project. After that you can actually configure the project:
./configure --enable-aice \
    --enable-amtjtagaccel \
    --enable-armjtagew \
    --enable-cmsis-dap \
    --enable-dummy \
    --enable-ftdi \
    --enable-gw16012 \
    --enable-jlink \
    --enable-jtag_vpi \
    --enable-opendous \
    --enable-openjtag_ftdi \
    --enable-osbdm \
    --enable-legacy-ft2232_libftdi \
    --enable-parport \
    --disable-parport-ppdev \
    --enable-parport-giveio \
    --enable-presto_libftdi \
    --enable-remote-bitbang \
    --enable-rlink \
    --enable-stlink \
    --enable-ti-icdi \
    --enable-ulink \
    --enable-usb-blaster-2 \
    --enable-usb_blaster_libftdi \
    --enable-usbprog \
    --enable-vsllink
If you get the error that libusb is missing then install libusb-dev with sudo apt install libusb-dev, this guide is assuming you're on Debian or Ubuntu.
When that is done all that is left is building the project.
make -j5
That's it, the binary has been compiled. There's no need to install it, if you wish you can run sudo make install but there's really no need.
CMSIS DAP
It's very likely you'll get Error: Could not find MEM-AP to control the core, this means you have to wipe the entire stick first.
You can do so by first executing ./src/openocd -d2 -f ./board_nrf52.cfg, keep it running and continue
If you get this error:
Open On-Chip Debugger 0.10.0+dev-00977-g22b4abc4 (2019-12-16-02:24)
Licensed under GNU GPL v2
For bug reports, read
        http://openocd.org/doc/doxygen/bugs.html
debug_level: 2

./board_nrf52.cfg:1: Error: Can't find interface/cmsis-dap.cfg
in procedure 'script'
at file "embedded:startup.tcl", line 26
at file "./board_nrf52.cfg", line 1
Then you have to add -s ./tcl to the parameters.
The second step to unlocking is to use telnet:
$ telnet localhost 4444
Trying 127.0.0.1...
Connected to localhost.
Escape character is '^]'.
Open On-Chip Debugger
> nrf52.dap apreg 1 0x04
0x00000000
> nrf52.dap apreg 1 0x04 0x01
> nrf52.dap apreg 1 0x04
0x00000001
After that you can easily install new firmware (sniffer_pca10040_129d2b3.hex) on your dongle:
$ ./src/openocd -s ./tcl -f board_nrf52.cfg -c init -c "nrf5 mass_erase" -c "program sniffer_pca10040_129d2b3.hex verify" -c reset -c exit
Open On-Chip Debugger 0.10.0+dev-00977-g22b4abc4 (2019-12-16-02:24)
Licensed under GNU GPL v2
For bug reports, read
        http://openocd.org/doc/doxygen/bugs.html
Info : CMSIS-DAP: SWD  Supported
Info : CMSIS-DAP: FW Version = 1.0
Info : CMSIS-DAP: Interface Initialised (SWD)
Info : SWCLK/TCK = 1 SWDIO/TMS = 1 TDI = 0 TDO = 0 nTRST = 0 nRESET = 0
Info : CMSIS-DAP: Interface ready
Info : clock speed 1000 kHz
Info : SWD DPIDR 0x2ba01477
Info : nrf52.cpu: hardware has 6 breakpoints, 4 watchpoints
Info : Listening on port 3333 for gdb connections
Info : nRF52832-QFAA(build code: B0) 512kB Flash, 64kB RAM
target halted due to debug-request, current mode: Thread
xPSR: 0x01000000 pc: 0xfffffffe msp: 0xfffffffc
** Programming Started **
Warn : Adding extra erase range, 0x000035c8 .. 0x00003fff
** Programming Finished **
** Verify Started **
** Verified OK **
Getting it working with WireShark
The same .zip you downloaded also contains the folder extcap, find WireShark's extcap folder (usually /usr/lib/x86_64-linux-gnu/wireshark/extcap) and copy the contents of folder there (do not nest two extcap folders!).
Then install dos2unix (with sudo apt install dos2unix) and convert the python script with dos2unix nrf_sniffer_ble.py, then cd into the SnifferAPI folder and run dos2unix *.
Now let's fix the permissions, first let's give the files to root for safety sudo chown root:root * and then sudo chmod 664 *.
Go into the extcap folder (cd ..) and run sudo chown root:root nrf_sniffer_ble.py, sudo chattr +x nrf_sniffer_ble.py and sudo chmod 775 nrf_sniffer_ble.py.
If you don't have the package described in requirements.txt installed then do so (sudo apt install python3-serial, not pip!)
Now remove nrf_sniffer_ble.sh, requirements.txt and nrf_sniffer_ble.bat.
WireShark should now recognize the dongle. Success!
If you get cp210x ttyUSB1: failed set request 0x7 status: -32 in dmesg then you might want to check if you're in dialout group, if not, add yourself and relogin. If that doesn't help then trying disabling hardware flow control in UART.py in the extcap folder.